
 Free Nationwide Delivery*
 Split Packs Availible
 Price Match
 Trade Accounts
To ensure your project runs smoothly.
Many Landscapers will have their own tried methods of how to lay paving slabs that work for them over several years, and as there are many variables to consider, the process may differ slightly depending on who you’re asking.
To get the installation process right is just as important as selecting the slabs, and familiarising yourself with the process ahead of time will help you to avoid costly mistakes. Whether you’re laying the paving yourself or you have a professional landscaper doing the job for you, we advise having a basic understanding of the process so that you know what to expect.
How to Lay a Patio: The Complete Guide to Laying Paving Slabs
To ensure your project runs smoothly, there are several important factors to consider when laying a patio. Whether you are installing paving yourself or working with a professional landscaper, understanding the correct process will help you avoid costly mistakes and ensure a long-lasting finish.
This guide explains best practice for laying paving slabs on a full mortar bed, based on professional landscaping standards.
Preparing to Lay Your Patio
Good preparation is essential before any patio installation begins.
Allow Time Before Installation
We strongly recommend accepting delivery at least 75+ hours before laying paving slabs. This gives you enough time to:
- Inspect slabs for damage in transit
- Assess natural colour and tonal variation
- Mix slabs from multiple crates
- Report any issues before installation starts
Checking slabs in advance prevents delays and ensures your landscaper can proceed without interruption.
How Much Wastage Should You Allow?
When calculating how much paving to order, always allow an additional 10% for wastage.
Why 10% Extra is Essential
Cuts are almost always required when laying a patio. You may need to cut slabs to:
- Fit around drain covers
- Finish edges neatly
- Install around steps or walls
- Work within irregular spaces
These off-cuts reduce the total usable square metre coverage.
Ordering extra also protects you against:
- Accidental chips during installation
- Natural stone variations you may choose not to use
- Breakages when cutting
With natural stone paving, tonal variation is normal. If using multiple crates, always mix slabs evenly across the area to ensure a balanced finish.
Why You Must Use a Priming Slurry
Using a priming slurry for paving slabs is strongly recommended and considered best practice in modern patio installation.
Also known as an SBR primer or slurry primer, it is applied to the underside of each slab before laying.
Benefits of Priming Slurry
- Creates a strong bond between the slab and the mortar bed
- Prevents slabs from loosening over time
- Reduces the risk of reflective staining
- Prevents natural salts and minerals from migrating upward
How to Apply Priming Slurry Correctly
- Dampen or cool slabs before application
- Apply the slurry evenly across the entire underside
- Lay onto a wet mortar bed immediately
Uneven application can cause moisture to rise unevenly through the slab, leading to patchy surface staining.
For consistency and reliability, always use a ready-made slurry primer rather than mixing on site.
Keeping the Patio Clean During Installation
Patio installation can be messy, but careful working practices prevent permanent staining.
Natural stone is porous and absorbs moisture quickly. Cement residue, mortar splashes and jointing compounds can soak into the surface if not cleaned immediately.
Best Practice
- Clean off any residue straight away
- Avoid letting wet cement dry on slabs
- Keep tools and mixing areas away from laid paving
Once stains penetrate natural stone, removal can be extremely difficult.
Many professionals choose to seal paving before installation to minimise staining risk.
Sealing Natural Stone and Porcelain Paving
We always recommend sealing your paving, whether Natural Stone or Porcelain.
Why Seal Natural Stone?
Natural stone is porous and absorbs:
- Wet leaves
- Bird droppings
- Moss and algae
- Surface water
Sealing helps:
- Prevent staining
- Reduce moisture absorption
- Minimise frost damage
- Inhibit moss and algae growth
Sealing Porcelain Paving
Although less porous, porcelain can still suffer staining during installation from cement and jointing materials. A porcelain protector makes cleaning easier and helps maintain appearance.
Always use a high-quality sealer and follow the manufacturer’s instructions carefully.
Installing Your Patio Correctly
Every patio project is different, but certain installation principles always apply.
- Install Below the Damp Proof Course
Paving should be laid at least 150mm below the DPC of any adjacent building.
- Ensure Proper Drainage (1:60 Fall)
A patio must slope slightly to allow rainwater to drain safely.
The recommended fall is 1:60.
This equals:
- 1 cm drop per 60 cm
- 1 inch drop per 60 inches
Always slope away from buildings.
Poor drainage leads to standing water, staining and potential structural issues.
- Avoid Clay-Heavy Soil
Clay soil drains poorly and softens when wet. This can cause:
- Slabs shifting
- Cracking
- Long-term instability
Ensure the ground is free-draining and built on a solid sub-base.
- Always Use a Full Mortar Bed
Avoid the following methods:
- Spot bedding
- Ring bedding
- Dot and dab
- Five dot method
These techniques leave voids beneath slabs, leading to:
- Movement and rocking
- Cracks under load
- Reflective staining
- Water retention beneath slabs
A full mortar bed provides consistent support and long-term durability.
- Plan Jointing and Laying Patterns in Advance
Before starting:
- Decide on joint width
- Confirm slab dimensions
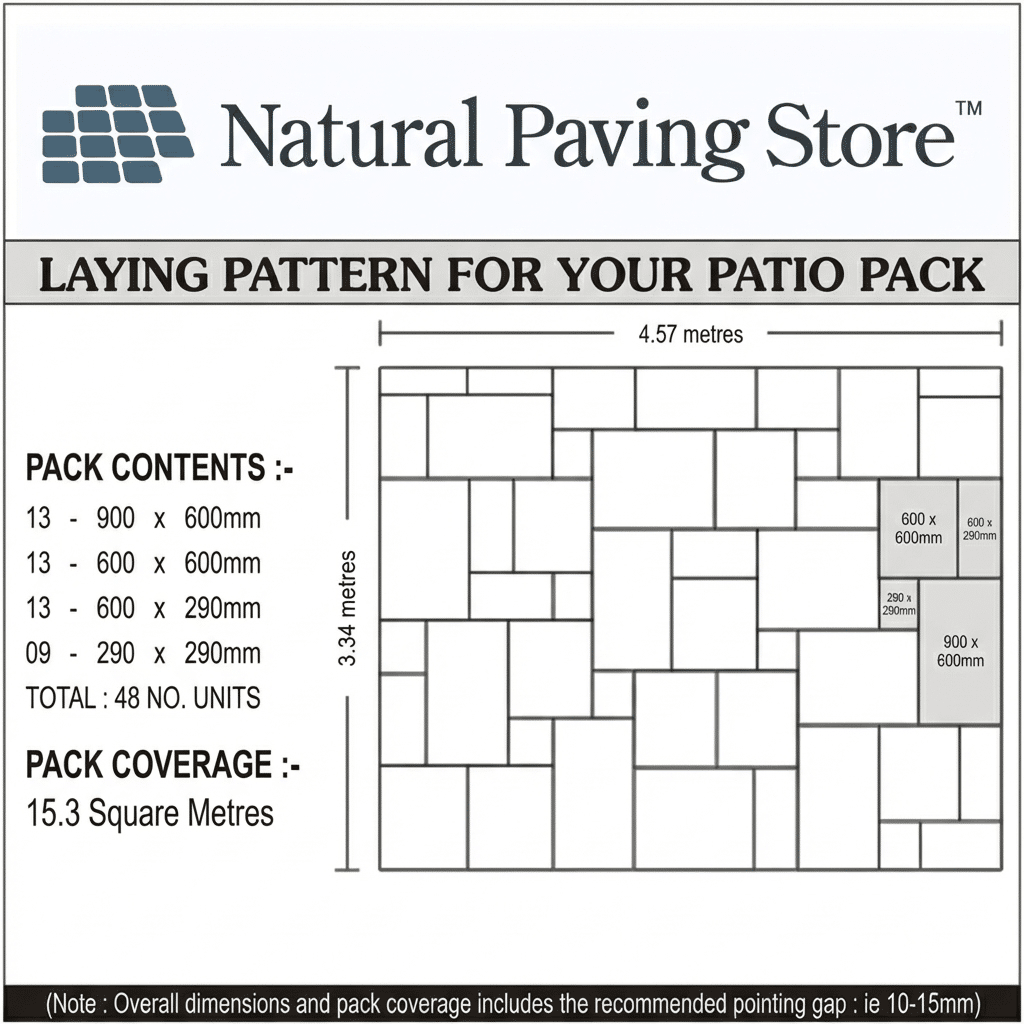
- Check patio pack sizes
- Plan your laying pattern
Dry-laying slabs before installation helps confirm layout and colour distribution.
Mixing Slabs from Multiple Crates
If laying paving from more than one crate, always mix slabs evenly throughout the area.
Natural stone varies in:
- Tone
- Veining
- Surface texture
Blending slabs avoids obvious colour blocks and creates a natural finish.
Patio Installation Checklist
Before laying paving slabs, ensure you have:
- Ordered 10% extra
- Inspected slabs for damage
- Mixed crates
- Prepared a strong sub-base
- Allowed a 1:60 fall
- Planned jointing
- Purchased priming slurry
- Selected a suitable sealer
Frequently Asked Questions
Do you need priming slurry for paving slabs?
Yes. Priming slurry ensures a strong bond between the slab and the mortar bed and prevents moisture movement that can cause reflective staining.
How deep should a patio base be?
The depth depends on ground conditions, but paving must always be laid on a solid sub-base and at least 150mm below the damp proof course of adjacent buildings.
Should you seal paving slabs before laying?
Sealing before laying can help prevent cement staining during installation, particularly with natural stone paving.
Final Thoughts
Laying a patio correctly is just as important as choosing the right paving slabs. By allowing for wastage, using priming slurry, installing on a full mortar bed, planning drainage and sealing correctly, you can ensure a patio that looks great and performs for years to come.